Best Aperture Canon Rebel T6 for Family Portraits
Camera Settings for Stunning Portraits
By: Laura Tillinghast
May 23, 2018
When getting started with portraiture, information technology tin can be challenging to understand all of your camera's settings and know the best ones to cull for the results you are after. The goal of this commodity is to help guide you in the right direction when working with your photographic camera settings for portraiture.
Nailing Focus in Portraits
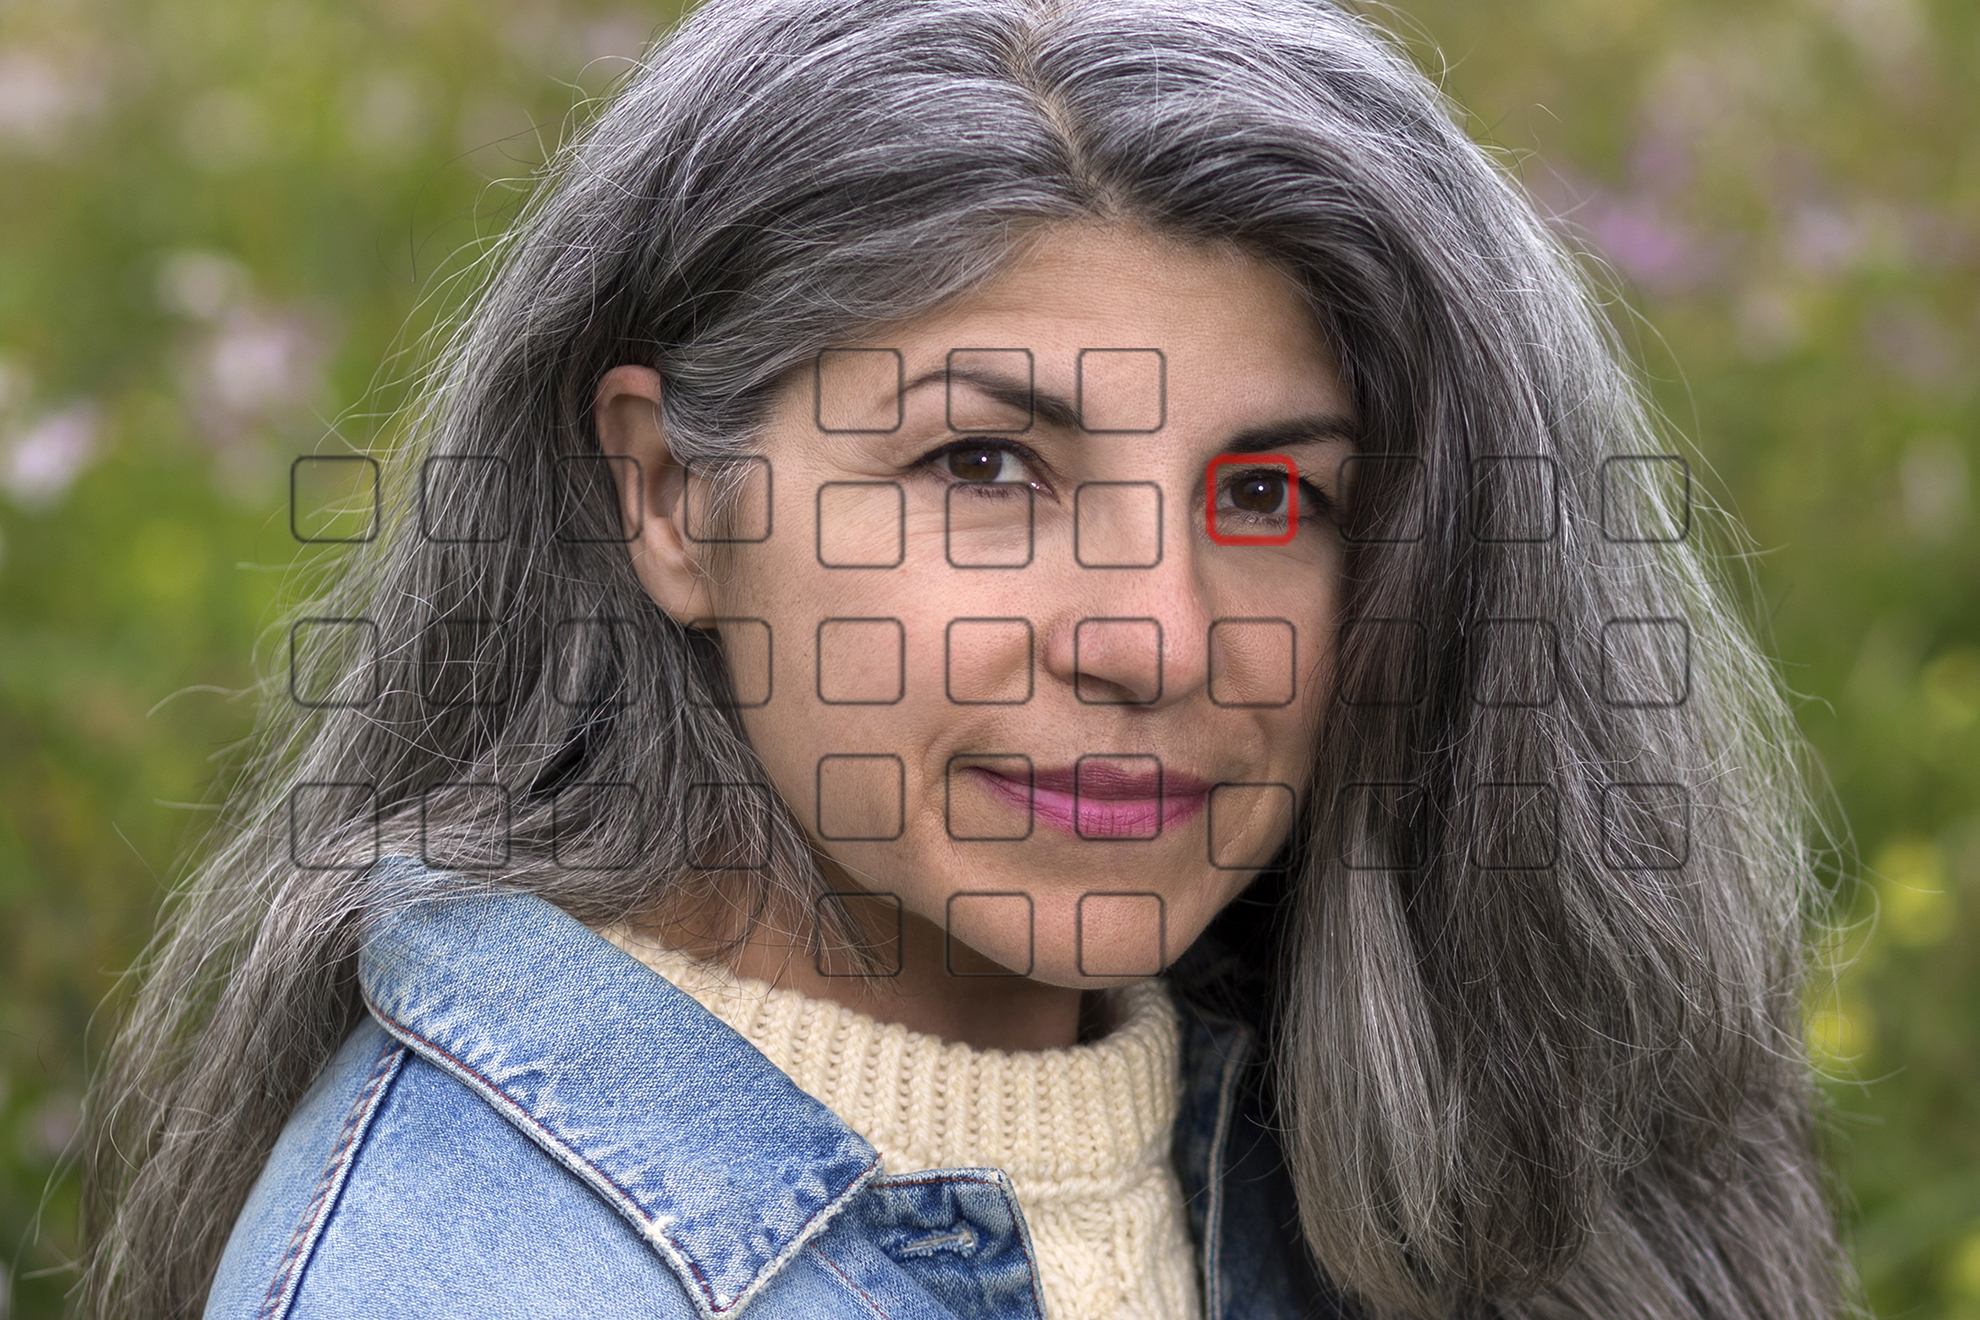
When information technology comes to portraiture, a basic rule of pollex is to brand certain that your subject'due south eyes are in tack-precipitous focus. At that place are exceptions to this rule simply in general, if your subject is looking into the camera, their eyes demand to exist in focus.
Your camera's Autofocus function is a dandy tool to ensure that your subject is in focus for every frame. You can manually cull to place an autofocus signal on your field of study's eye(southward) or you can use your camera'southward intuitive autofocus features. Cameras like Canon's EOS 7D Marking 2 and EOS 5D Mark IV offer Face Detection capability, even shooting through the viewfinder, which is helpful if your subject is in motion.This works especially well for photographing young children on the motion.
If you lot are shooting in low light situations or if you lot're working with a shallow depth-of-field, a tripod or monopod tin exist a swell assist for preventing "camera shake" and achieving a sharp portrait. It'southward also of import to brand certain that your viewfinder's diopter, or eyepiece, is adjusted correctly. It's adjusted with the tiny wheel to the side of your viewfinder that allows you to fine-melody the focus of your eyepiece in accordance to your vision. One easy way to adjust the diopter is to remove the safety eyepiece so you have admission to the diopter bike. Next, simply look through the viewfinder and activate the data panel on the lesser of the viewfinder by touching the shutter push button. Finally while looking through the viewfinder, adjust the diopter bike until the information panel becomes sharp. Don't forget to replace the prophylactic eyepiece to the viewfinder. Washed!
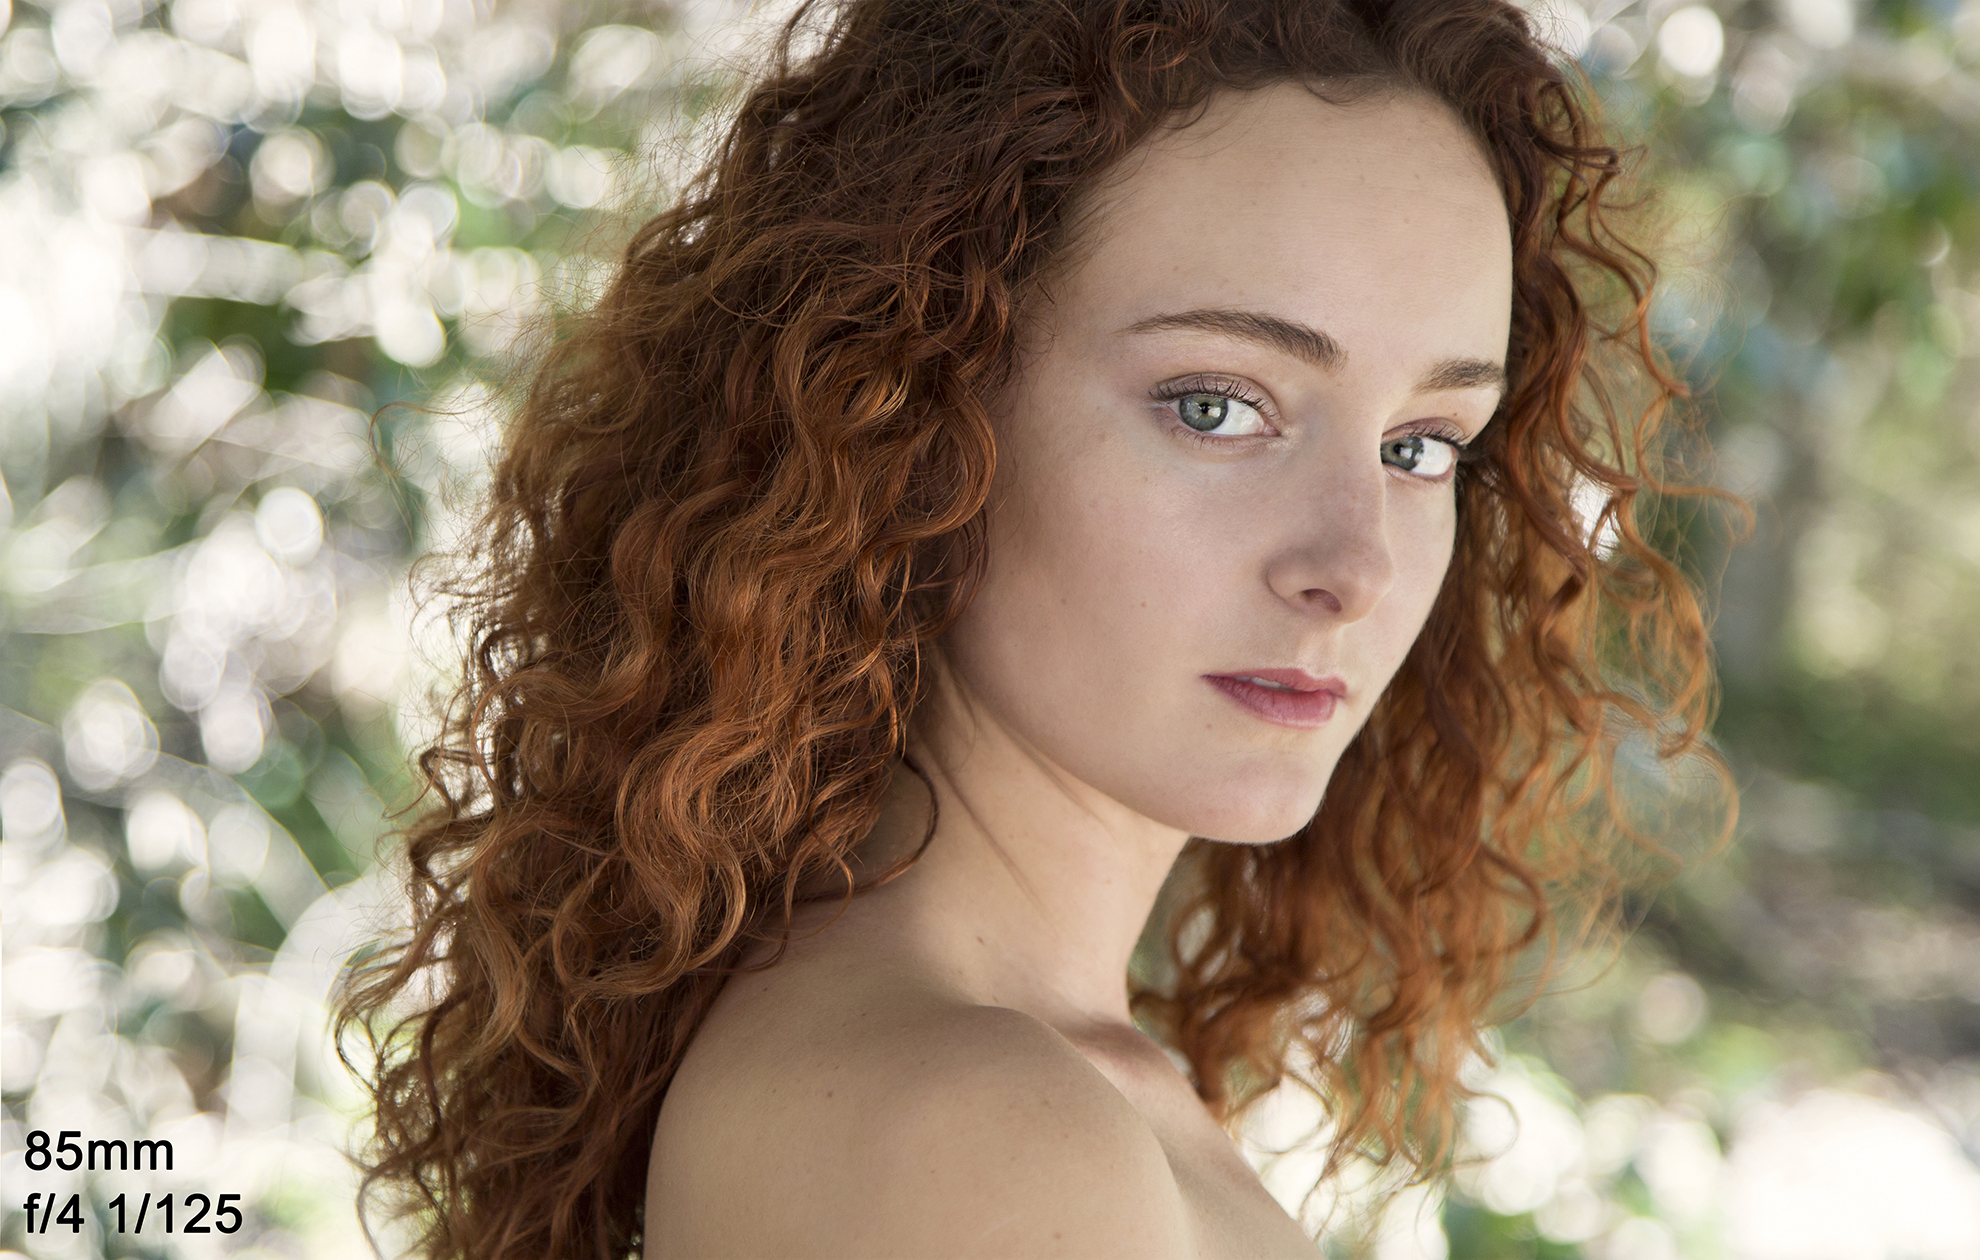
When because focus, it's important to cull your f-end wisely. A popular arroyo is to gear up a wide aperture (effectually f/2.8 - f/5.6) to capture a shallow depth-of-field. This makes the background backside your subject slightly blurred, helping them to stand out better. It's of import not to go too broad, as you unremarkably want your discipline to be equally in-focus as possible. At the wider apertures such as f/2.8 and f/4, if your subject is turned slightly away from the camera, and so often the center furthest from the lens volition non be in sharp focus.
Shutter Speed & ISO
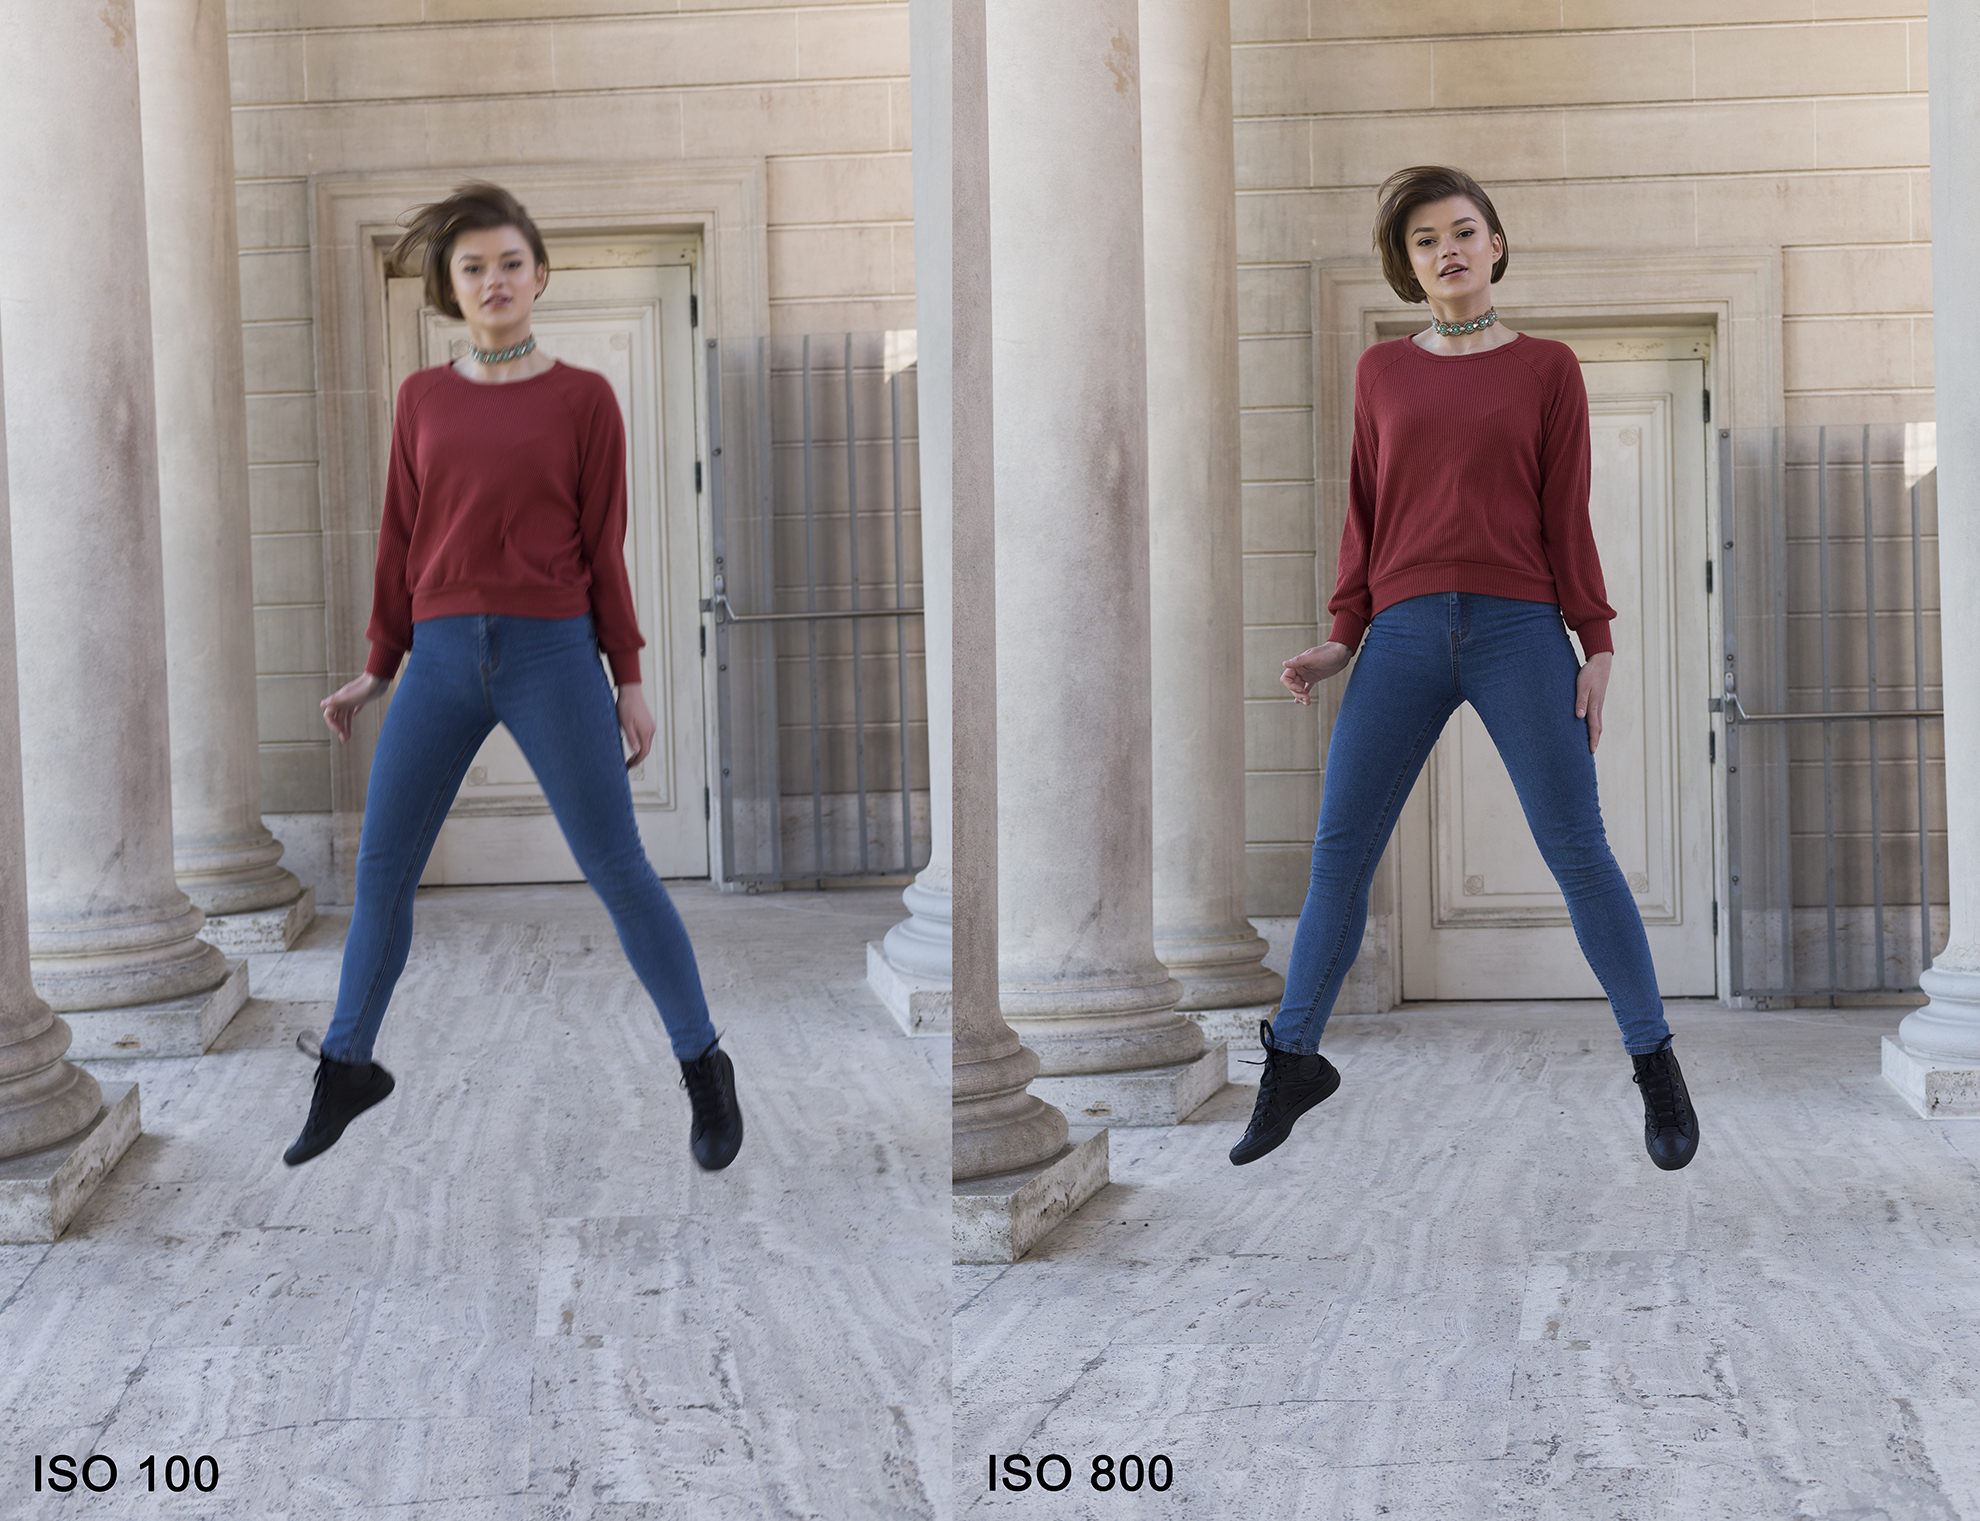
For portraits captured in natural or ambient light, the slowest shutter speed to consider working with handheld is typically 1/60th. Working with longer lenses, such equally 200mm or 300mm, yous'd ideally want to be around i/250th or faster. Using shutter speeds slower than this, particularly at longer lens focal lengths, can result in shaky captures that are blurry and/or out-of-focus. Consider utilizing a tripod or increasing your photographic camera's ISO to allow for a faster shutter speed if you're working indoors or in low low-cal. The just downside of increasing your ISO is that you'll notice that the "racket" or "grain" in your shots begins to increase as your ISO goes up. When shooting portraits, it'south best to continue your camera's ISO ready to as low a number as possible to ensure detail and minimize digital "noise."
A good way to command depth-of-field but nail exposure is to shoot in Aperture-priority mode (Av on the Style Punch of Catechism cameras). In this shooting way you lot can choose your f-cease manually and then your camera will employ its internal light meter to automatically set the shutter speed for a right exposure. As you motion and lighting conditions change, your camera will suit the shutter speed as needed. This volition allow you to concentrate on composition and working with your subject, at a lens aperture you've dialed in.

Another thing to consider when shooting portraits is what to do when your subjects are moving. Using a faster shutter speed tin can help to freeze motility and minimize blur, but you tin only push your shutter speed so far when lighting weather are out of your command (which it often is for consequence portraiture). Increasing your camera'south ISO tin really help to eliminate motion blur. Ideally, for moving subjects in daylight (without flash), you'd want to use shutter speeds of 1/500th or faster.
For studio wink lighting or with Speedlites, the maximum recommended shutter speed is more often than not 1/160th or i/200th. Most cameras volition not sync with an external flash above 1/200th - 1/250th unless they are capable of High-Speed Sync (HSS) and this is unremarkably possible only with Speedlites. Sync speed refers to the fastest shutter speed the camera is capable of using to expose the whole frame at in one case. By and large, the sync speed varies betwixt 1/125th and 1/250th, depending on your camera. You can piece of work at slower shutter speeds and use flash, but not at faster shutter speeds, unless you use High-Speed Sync.
With High-Speed Sync, the flash fires a smashing number of times in rapid succession during the exposure in order to expose the sensor evenly across the entire frame. This allows for much faster shutter speeds, which is proficient for two reasons. First, information technology allows you to open your camera up to wider f-stops for capturing cute portraits with a blurred background — even in bright daylight. Second, a faster shutter speed can permit for freezing motion. This works especially well when shooting dancers, athletes or whatsoever portraits with move. Keep in heed that as shutter speeds become faster with Loftier-Speed Sync active, flash output is progressively reduced, for technical reasons.
File Type
For portrait photography, it is recommended to work with RAW files whenever possible. A very of import aspect of RAW vs. JPEG shooting, for portraits or other types of subjects, is how disquisitional settings similar White Rest and Picture Style are applied. With RAW image files, White Residuum settings tin can usually be completely changed without losing any particular or pixel data, during RAW file processing. With in-camera JPEGs (or video files), it's imperative that your White Balance and Motion-picture show Mode settings are right at the time of capture, because you cannot just change them after during mail service-production. With JPEG files there'south fiddling "headroom" to make pregnant adjustments, even with high-cease paradigm editing software.
Event photographers oft cull to shoot both RAW files as well every bit JPG files simultaneously. This allows them to have JPG files on hand for on-site slideshows or quick turnover to a client, while the RAW files are as well being captured. The RAW files are used later for press and any major editing that needs to be done.
White Balance for Portraits
Your camera's White Balance setting refers to the color temperature of the light when the image was captured. Portraits captured in sunlight will take a cooler color temperature than portraits captured with indoor tungsten lighting, which has a warmer color temperature. Your camera's White Balance setting helps to ensure that white shades announced white and that peel tones are rendered accurately. Most cameras come with the option to manually set or adjust white balance. These settings typically include Sunlight, Shade, Tungsten, Fluorescent, etc.
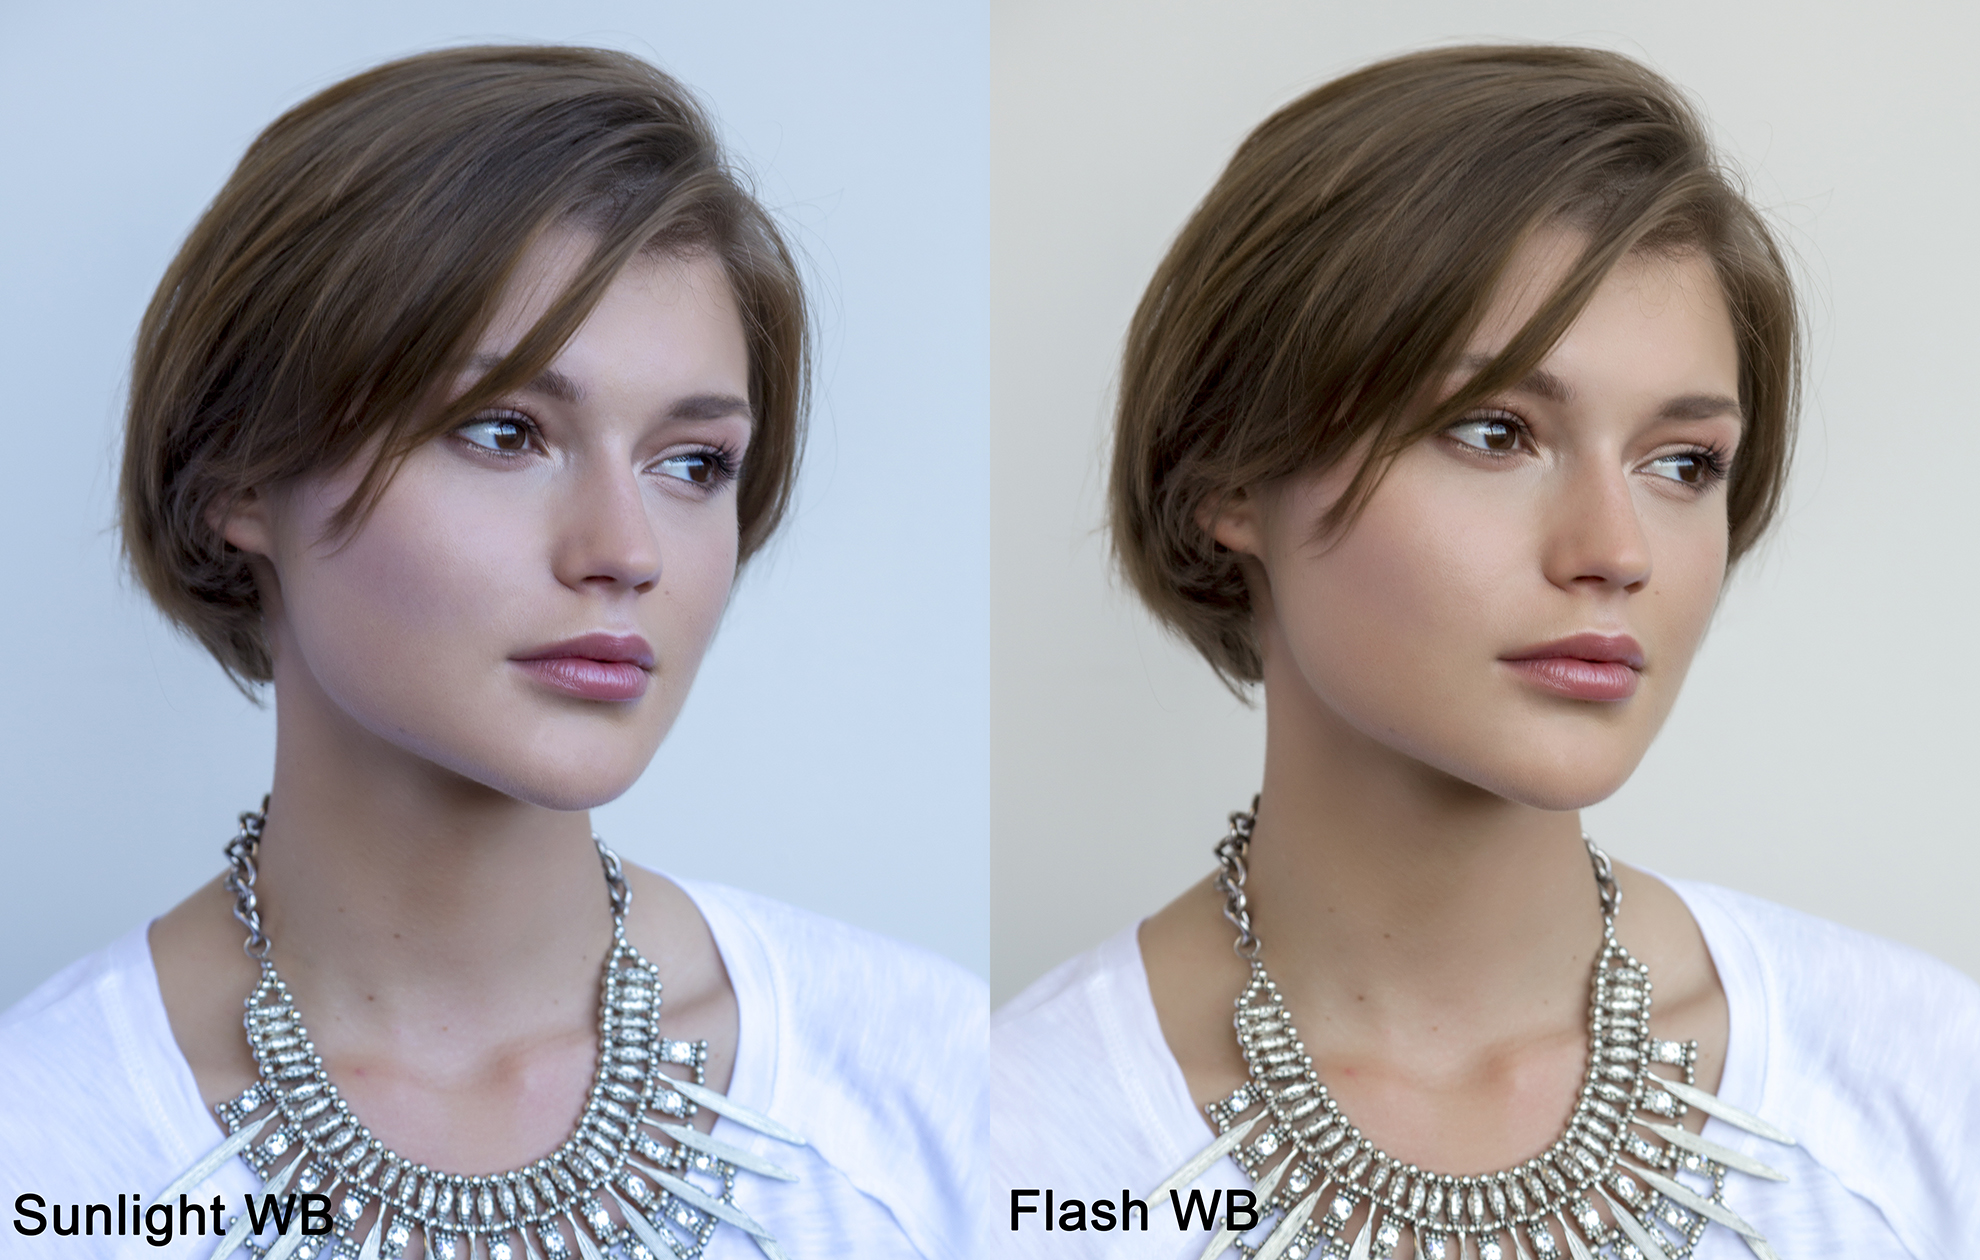
Most of the time using a white remainder setting that matches the lighting weather volition event in first-class portraits. However, you tin use a warmer White Rest setting with portraiture for a more natural look. In the example below, the portrait on the left was captured in natural light with the Sunlight white balance setting. This resulted in accurate skin tones but a slightly cool tone to the image. In the portrait on the right, the White Balance setting was switched to Flash for a warmer color temperature. The result is more realistic skin tones and a more than inviting tone over all. The Cloudy and Shade WB settings will add even more than warm, amber tones.
Picture Styles for Portraiture
Catechism's Picture Way settings brand it easy to become optimum image quality past choosing from a few overall styles. Each setting has its own subtle look to colour rendition, contrast, and sharpening. You can farther change each as needed in your camera's menu, or with Canon's Digital Photo Professional (DPP) software.
For portraits, you desire to avoid the Landscape Picture Fashion every bit information technology tends to increase saturation in blue and green tones to emphasize a natural landscape. This can expect a scrap unnatural in portraiture and be unkind to skin tones. The Portrait Picture Fashion is 1 place to experiment when you first begin with portraiture, as the color tone and saturation are set to obtain warmer skin tones. Shots will as well await great on the back of the camera, which comes in handy if y'all share your images with your subjects during your portrait session.

Picture show Mode Shooting Manner on the EOS 77D
Burst Mode/Drive Modes
Many DSLR cameras offer more than one Drive mode for different shooting conditions. If you select Unmarried Shooting, the camera fires one shot each time the shutter button is fully depressed. This works well for posed portraits and most wink photography.
In Continuous Shooting mode, the camera'south shutter keeps firing for as long as you depress the shutter button fully. This works really well for subjects on the move such equally dancers, athletes, performers, etc. For fast motility, you lot desire to utilise the High Continuous Drive Fashion of your camera, in gild to capture the maximum amount of shots and not miss any of the activity. Even entry-level interchangeable-lens cameras these days can shoot up to 3 frames per second in daylight weather condition, and more advanced cameras tin can shoot at 5fps or faster.
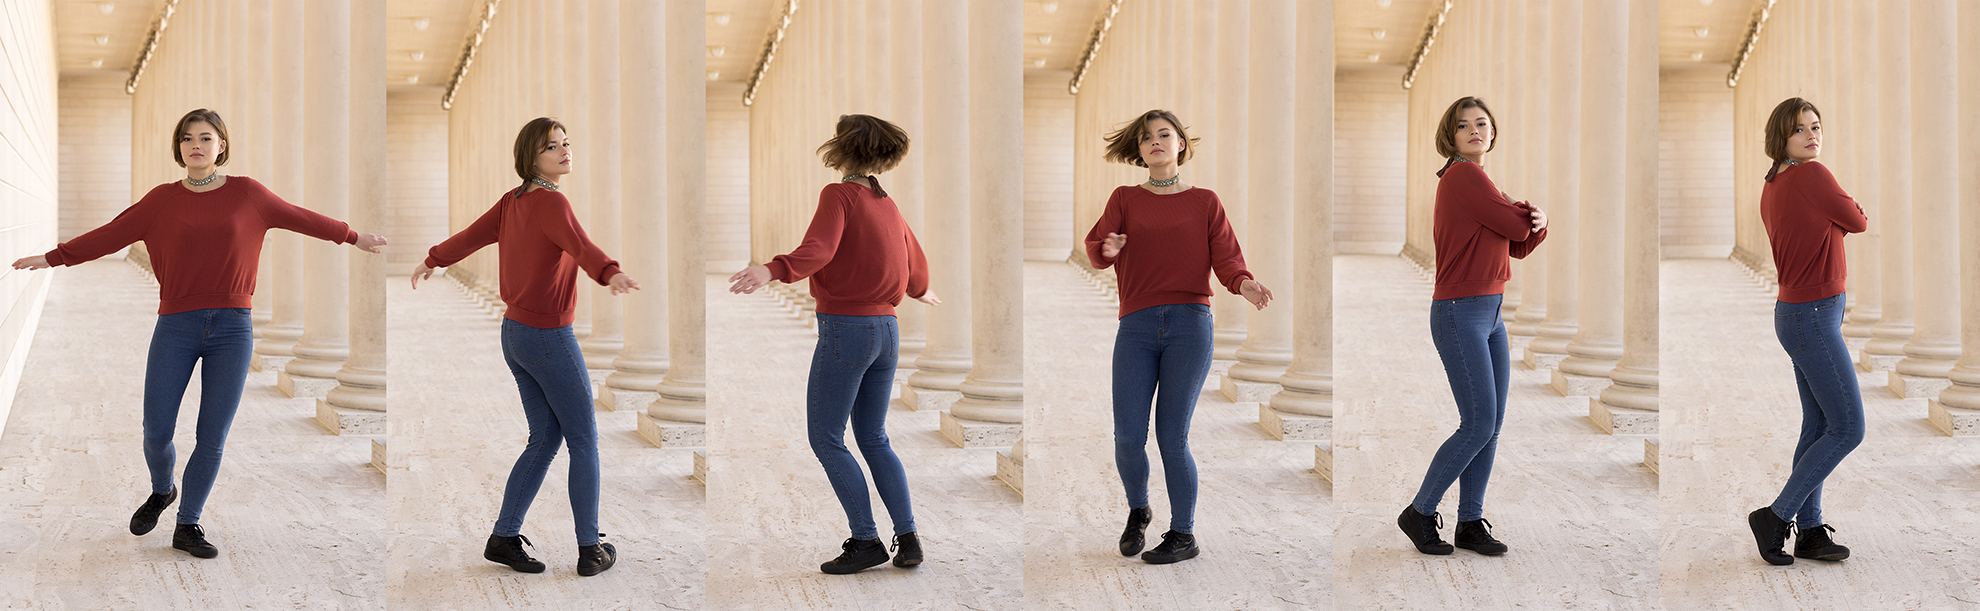
Full-length action portraits captured with Continuous Shooting Mode
The more than you practice these settings and go to know your camera, the easier it will exist to capture not bad portraits. As y'all get more comfortable with your camera's Shooting Modes and Picture Styles, you will naturally begin to focus on the other areas of portraiture that are so vital to success, like posing and composition. Practise makes perfect, so go out there and shoot!
Source: https://www.usa.canon.com/internet/portal/us/home/learn/education/topics/article/2018/july/Camera-Settings-for-Stunning-Portraits/Camera-Settings-for-Stunning-Portraits
0 Response to "Best Aperture Canon Rebel T6 for Family Portraits"
Postar um comentário